How to hang a decorative plate wall
As if gallery walls weren't hard enough to hang, turn that into a plate wall and you got yourself a real head-scratcher. I started this project by designing the layout on the floor, once we landed on a layout we liked, I snapped a photo to capture it, all the while trying to figure out how the heck I was going to transform what I designed on the floor onto the wall.How will my perfectionist brain handle this pickle?!While I pondered on that, I affixed plate hangers to the backs of the plates. The instructions said that we should allow 24 hours to dry before hanging, so I went home and pondered some more on how to transfer my design from floor to wall without screwing the whole thing up (no pressure!). Then I remembered a tip I read about gallery walls, and how using a large sheet of paper could easily allow you to transfer a gallery wall design to a wall.YESSSSSSSSSS!I asked my client if she still had the roll of paper she bought when we last hung a gallery wall in her home (my previous strategy for gallery walls was to cut out paper in the size of art, but this seemed annoyingly difficult to do with round plates). Sadly she confirmed she didn't. So while I went downstairs to raid her recycling bin for newspaper I could tape together, she saved me by suggesting we use wrapping paper.Genius, an actual genius she is!I cannot stress how absolutely easy this strategy made this project!
Here's how I did it
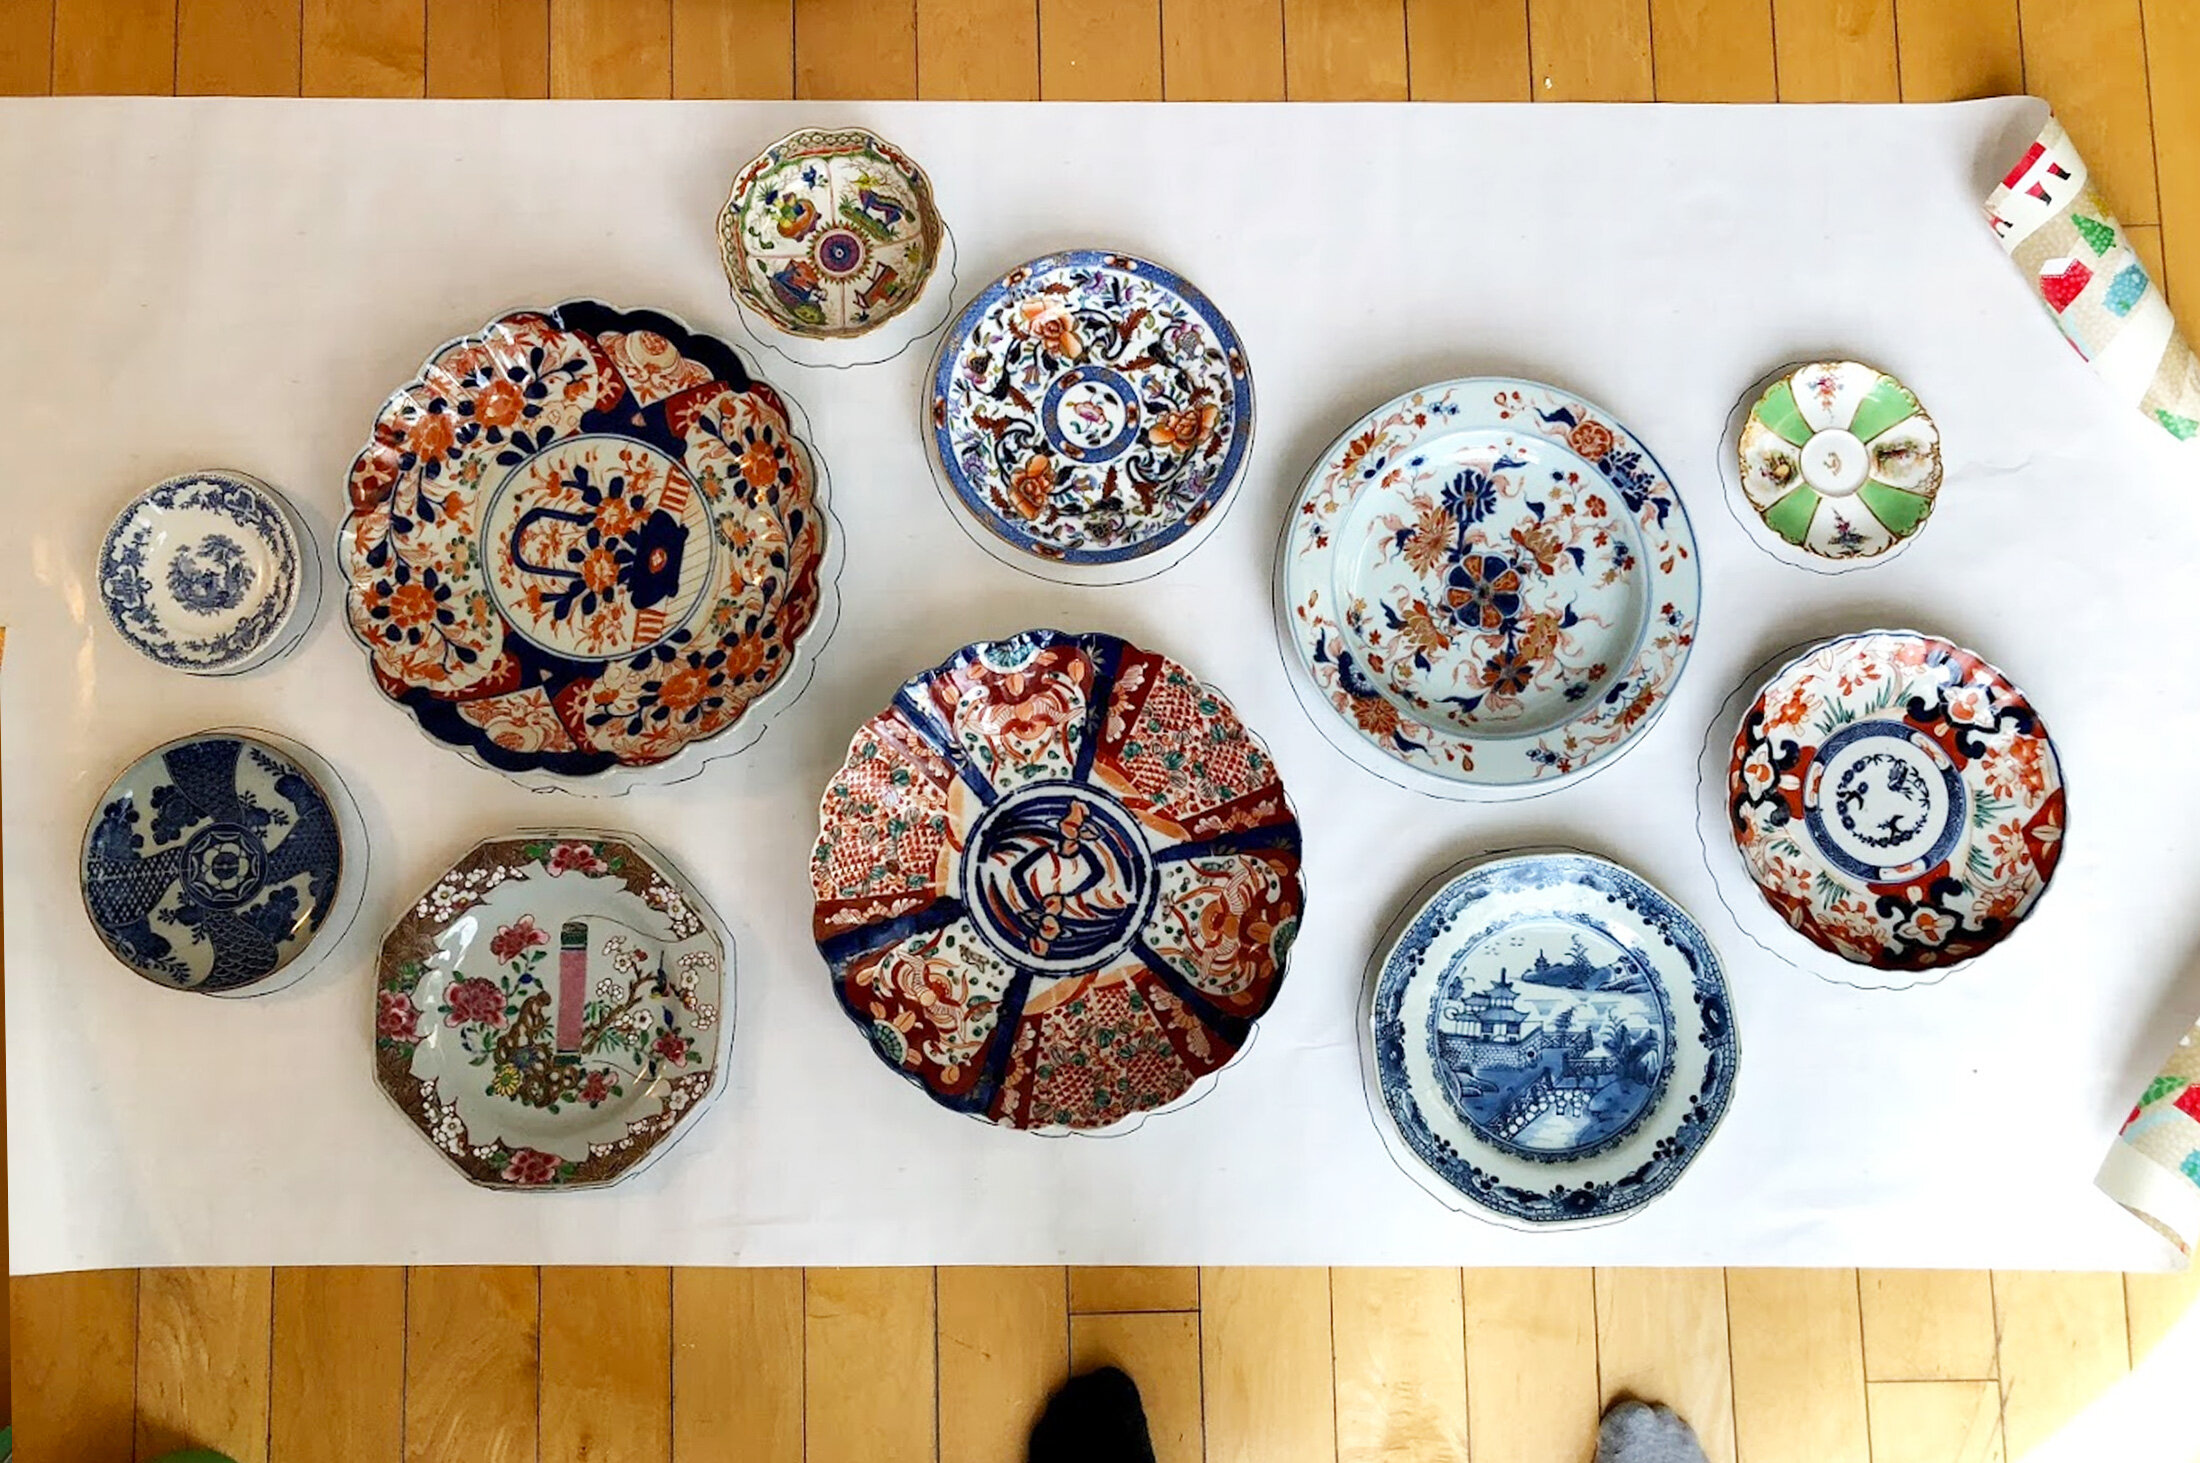
1. Unroll wrapping paper (or craft paper) as wide as the wall is you are hanging the plates on. Create your design on top of the wrapping paper.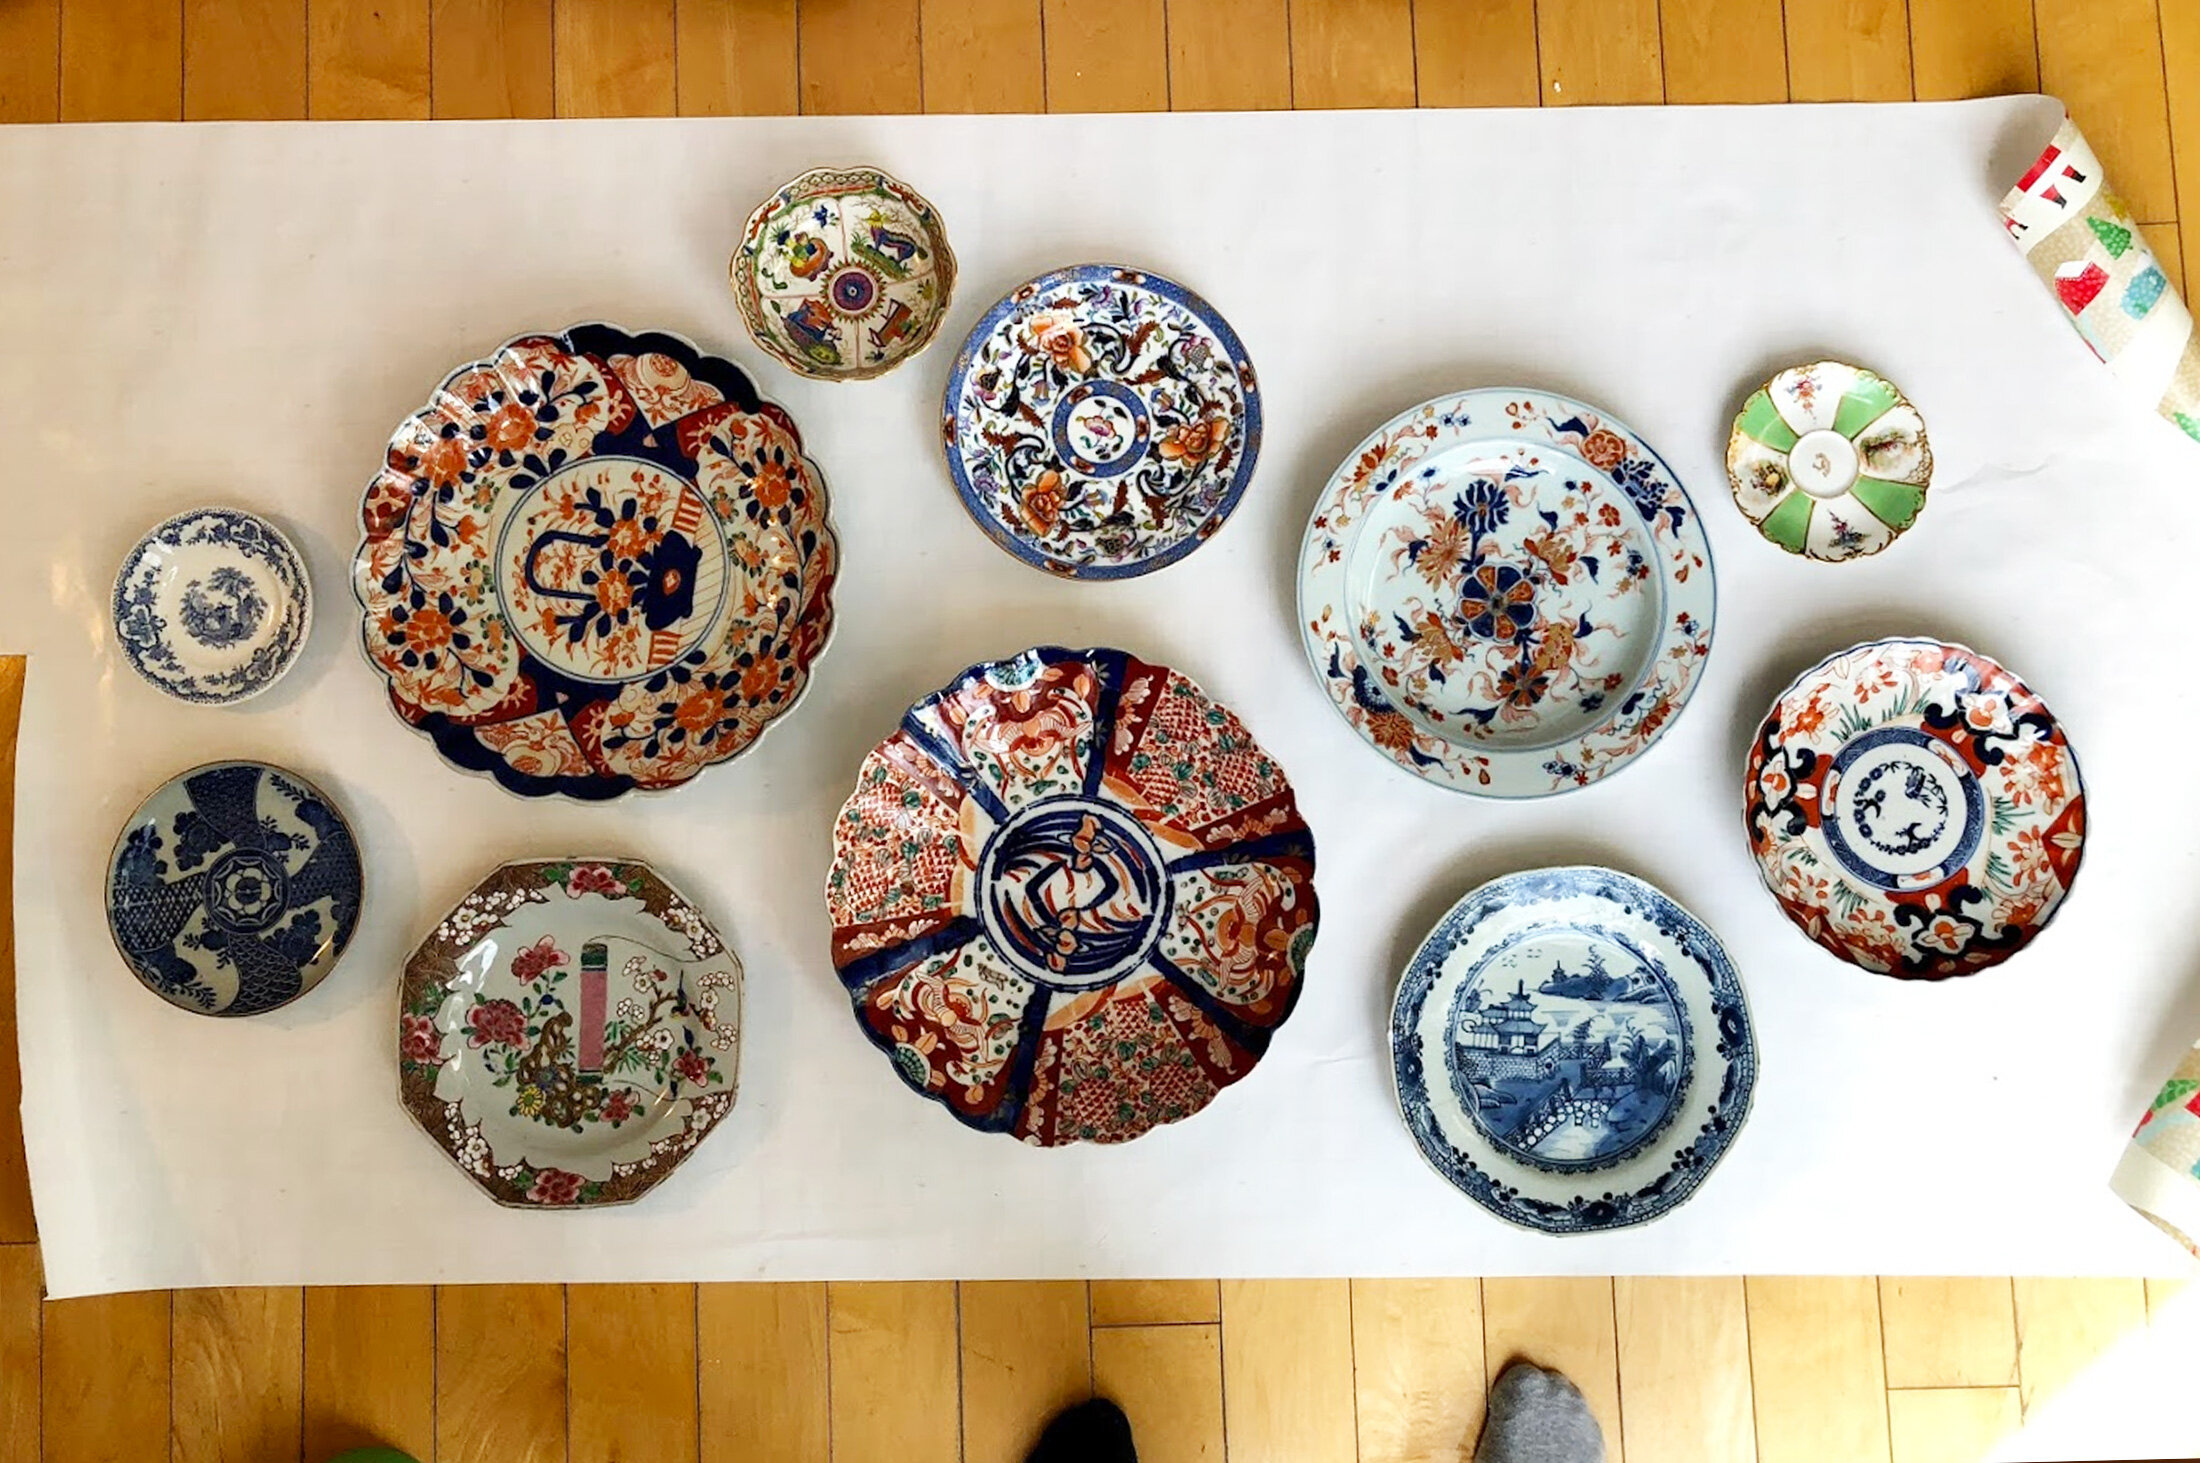 2. Using a sharpie outline all the plates.
 4. Remove all the plates (duh).
 5. Using painters tape; hang the wrapping paper on the wall.
 6. Measure the placement of the hooks on the back of the plates, then using that measurement install hooks on the wall using the outlines as a guide.
 7. I decided to remove the paper before the smaller plates (the three outlines you see below) were hung to determine whether I felt they were needed in the design. To do this I took down all the existing plates that were hung, removed the paper, then after assessing I decided not to install one of the plates, as it felt like too much once I saw it on the wall.
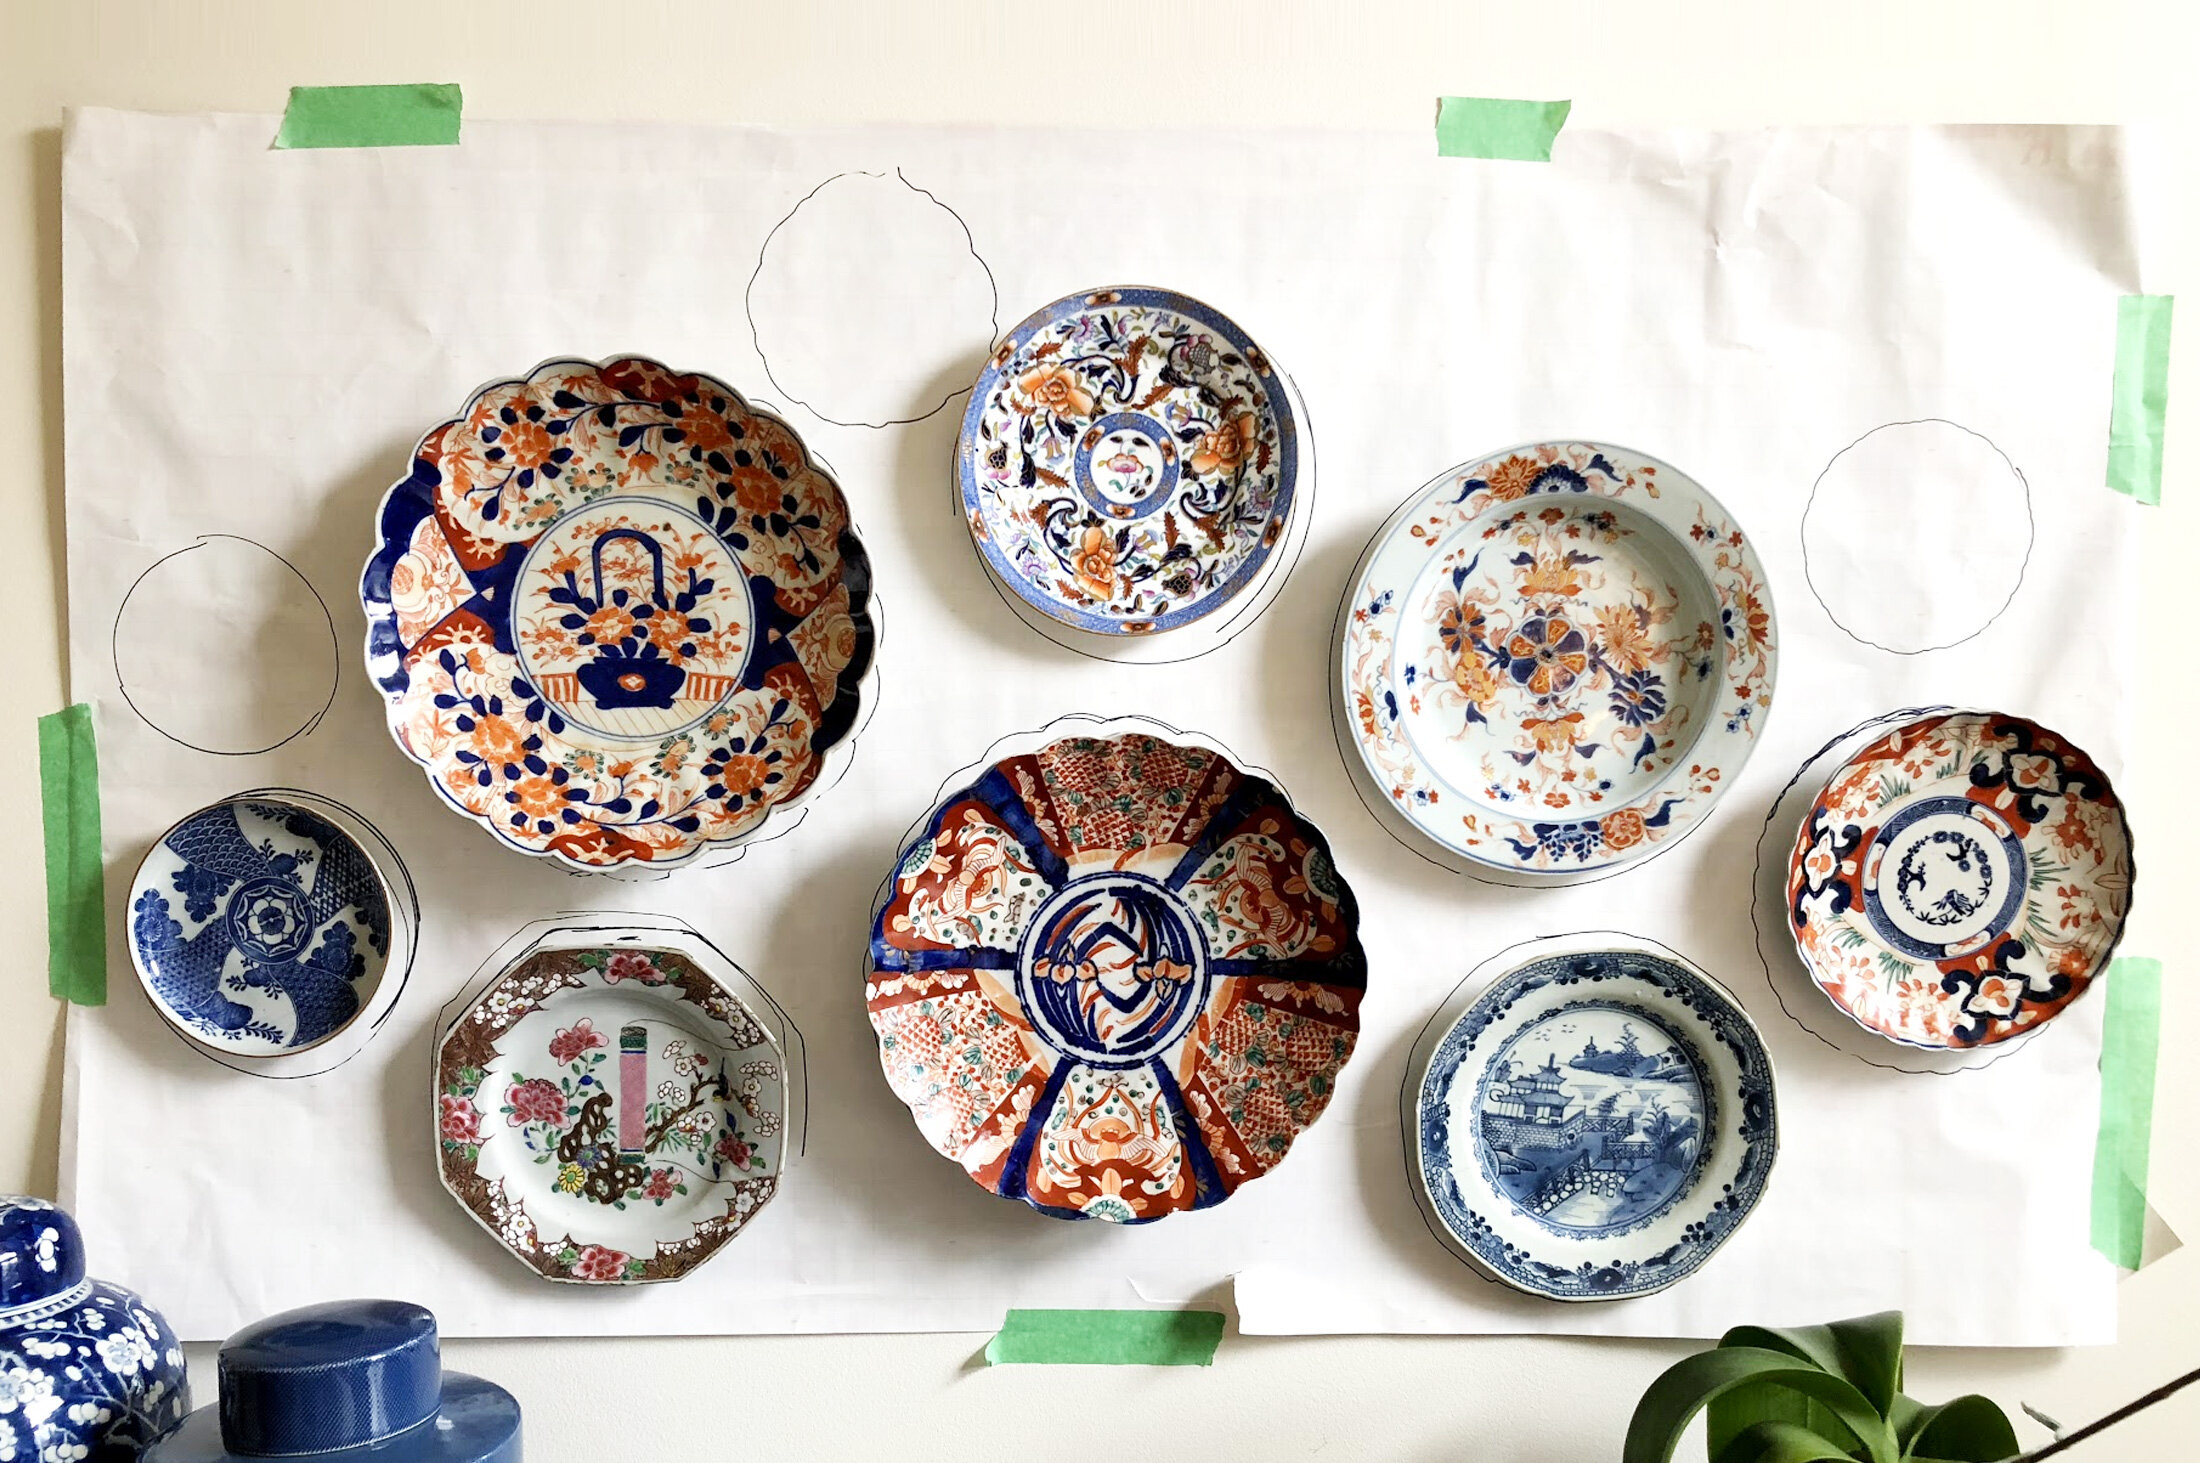 8. I hung the last two small plates on either side of the design and the end result is this perfectly planned decorative plate wall!This took me about an hour and a half to hang plus the time to design the layout. I am pretty happy with the end result!

